

How To Install Sioux Chief Stainless-steel Flange Repair Ring
Broken Plastic Toilet Flange Metallic Repair Ring Installation Guide
How to fix a cracked plastic toilet flange with a Sioux Chief stainless steel repair ring and Tapcon physical screws.
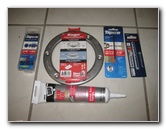
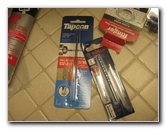
Sioux Master & Tapcon
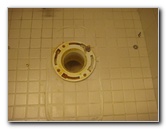
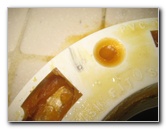
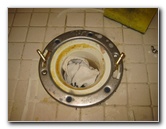
Snapped Plastic Toilet Flange
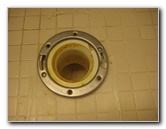
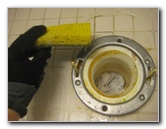
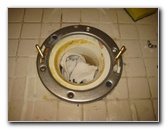
Lower Metal Repair Band
For this procedure, you'll need a toilet flange repair ring, a masonry 5/32" x 3 1/2" masonry drill bit, a box of Tapcon three/16" x 1 three/iv" physical screws, a sponge, some water, a towel and an electrical drill.
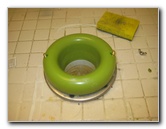
The start 2 steps are to clean off whatever wax from the erstwhile toilet wax ring gasket and identify a towel in the sewer pipe to forbid tools from falling down in to the piping.
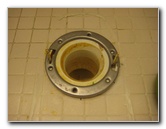
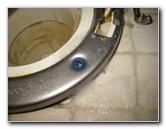
Lower the metal repair ring over the quondam damaged plastic toilet flange.
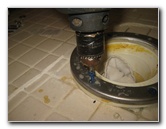
Test Fit Cupboard Bolts
Bosch Masonry Drill Bit
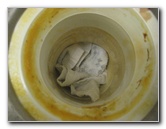
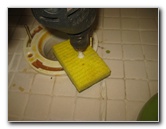
Towel - Block Sewer Gas
Insert the closet bolts that will secure the toilet to the floor.
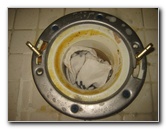
One time you are happy with the positioning of the metal repair ring, yous can use a marker or the sharp tip of a screw to marker the spots where you will drill holes and install the screws.
I bought both a Bosch five/32" masonry drill chip for standard rotary drills and besides the Tapcon 5/32" brand brick and concrete drill bit that is supposed to be used with a hammer drill.
I was worried that one of the drill bits would wear out half fashion through the job and strength me to gild another drill bit.
Wet Sponge - Use Water
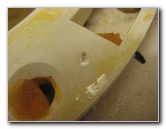
Mark Spot To Drill Hole
2d Screw Location
Use an old kitchen sponge and soak it with water.
![]() Avoid touching the electric drill with wet hands or the wet sponge. I recommend wearing some condom gloves every bit an extra safety precaution.
Avoid touching the electric drill with wet hands or the wet sponge. I recommend wearing some condom gloves every bit an extra safety precaution.
Continue Drill Flake Cool
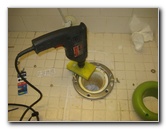
Tedious & Steady - Tile
First Screw Secured
And so drill through the moisture sponge and in to the hole that yous previously started.
Utilise light pressure to the drill and start drilling at a low to medium speed through the ceramic tile.
Stop drilling every fifteen to 30 seconds, pull the drill bit out of the hole and place information technology on the sponge to cool it off.
You lot will notice the hot drill bit hissing and creating steam when y'all place information technology on the wet sponge.
One time you have drilled through the tile and in to the physical, y'all can bulldoze in the first Tapcon spiral.
To bulldoze in the concrete screw, use medium pressure on the electric drill and go at a medium speed with out stopping until the screw is flush with the metallic repair band.
Sometimes physical screws can be difficult to get going again if you stop with the screw half style in. I've read that another trick for preventing stuck or "frozen" concrete screws is to use some screw wax lubricant or use every bit whatsoever wax based lip balm.
Three Screws In Identify
Drive In Tapcon Spiral

Repair Ring Installed
Drive in the 3 other screws to secure the metal repair ring.
Pull up on the metal repair ring to verify that it is securely in identify.
Plastic Flange Repaired
Sani Seal Toilet Gasket
I've used the Sani Seal gaskets several times in the past and they are great since yous can re-position the toilet many times.
If you lot are using a traditional wax band, you but get one chance to position the toilet.
For more, check out my other Home Repair & Maintenance Guides.

Source: https://www.paulstravelpictures.com/Broken-Plastic-Toilet-Flange-Metal-Repair-Ring-Installation-Guide/index.html
Posted by: holmesshoustor.blogspot.com
0 Response to "How To Install Sioux Chief Stainless-steel Flange Repair Ring"
Post a Comment